Howard Miller 622779 Setup and Installation Instructions
Posted on October 11, 2016 | By clockde
622779 Setup and Installation Instructions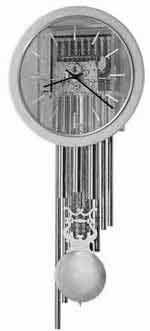
The Howard Miller 622779 movement plays Westminster, Whittington, and St. Michael chimes on nine seamless, brass tubes with a selector lever on both sides of the clock case. *This clock is a tubular chime clock. If you were looking for a chime rod clock, follow key wound wall clock with chimes.
- Carefully unpack all four cartons. Remove all packing material from clock dial, lyre pendulum, chime tubes, drive weights, and clock body.
- Remove the rear section of the top panel from the clock body. USING EXTREME CARE TO AVOID DAMAGE TO MECHANISM, remove the spring clip (Figure 1) used to secure the pendulum guide during shipment. Save this clip. It is reusable if the clock is later transported. Cut and remove the security band stretched around the chime hammer assembly (Figure 2).
3. Do not remove the foam blocks from between the cable pulleys and shelf, at this time. When your clock is fully set up and running approximately 24 hours the blocks may easily be removed. The blocks are reusable if the clock is later transported.
4. With top panel off, place the clock on the wall in the desired location using the provided hang plate that was designed for wall stud installation. Be sure to allow adequate floor clearance, when installing the plate, and to hang your clock plumb and level.
Hanging the Tubes
**NOTE: it is 54 inches from the hang plate to the end of the longest tube on the 622779.
5. Assemble a hanger clip on each chime tube as shown in Figure 3. Begin hanging the chime tubes on the rack at the upper back movement in order of size with the longest tube on the left as you face clock from the front. (Figure 4)
6. Position the dial on the clock body in the open position, aligning the hinges on the dial with the threaded holes in the upper front of the body. Secure the dial to the body using the 6 wood screws that were provided. With the tabs facing inward, Lower the dial over the clock front aligning the holes in the dial with hand shaft and winding arbors. Turn the tabs outward into the slots in the clock body. Tighten the screws. If the holes do not line up with the hand shafts; the Plexiglas dial can be repositioned in the outer frame by loosening the screws located on the backside of the frame, moving the dial, and re-tightening the screws.
7. The clock hands are shipped unassembled to the movement. Hands must be installed in the 12 o’clock position. The hour hand should be pressed on the shaft far enough to clear the minute hand when the nut is tightened while not binding on the dial or hour markers. Install the minute hand by tightening the nut clockwise with small pliers, using tape or a cloth to protect the hand and nut from damage. The second hand is inserted over the shaft allowing clearance for free operation.
8. Locate the pendulum guide (Figure 5). Lightly hold the pendulum guide with your left hand, and place the hook on the top of the pendulum, through the slot of the pendulum guide, and lower the pendulum until it is hanging (Figure 6).
9. Remove the three (3) weights from the carton. The weights are labeled on the bottom as to their location when facing the front of the clock. Check the weights to see that they are still tightly put together. Check to make sure that the cable is in the pulley. Hang each weight on the appropriate pulley. (Figure 7) Replace the top Panel. NOTE: After approximately 24 hours of operation of your 613779, the pulleys will clear the Styrofoam blocks, at which time the blocks may be removed.
10. Gently swing the pendulum to start the clock. Set the clock on time by moving the minute hand backward (counter-clockwise) until the minute and hour hands are on the correct time. It is not necessary to wait for the clock to chime as the minute hand passes each quarter hour since the movement has a self-correcting device, which synchronizes the chimes with the time. Should the clock not chime properly, after setting the clock on time, permit it to run two or three hours, during which time it will correct itself.
11. To regulate the 622779, hold the pendulum disc and turn the regulating nut located under the pendulum disc to the left if the clock runs fast and to the right if the clock runs slow. (Figure 8) One turn of the nut will regulate the timekeeping approximately two minutes a day. After adjusting, be sure that the pendulum disc is snug to the regulating nut.
12. Located on the sides of the dial of the 622779 are two levers. The right side lever allows for the selection of the melodies, and the left side lever for the strike selection. When you select “Night off”, the automatic night shut off feature is activated. This means the clock will not strike after 10:00pm until 7:15am. If the sound is not clear, adjustment of the hammerheads may be needed. Normally, the distance between the chime tube and the hammer head should be 1/16″. Adjust this by turning the screw on top of the hammer assembly. (Figure 9)
DO NOT MOVE EITHER SELECTOR LEVEL WHILE CLOCK IS CHIMING.
(download PDF file to view images of the 622-779 for these instructions)
Shop all Keywound Wall Clocks here
Recent Comments